The article “Combinatorial Testing” focuses on the insights of software testing methods. This article explores the evolution of combinatorial testing, talking about advancements in algorithm performance and constraint representation. The article also talks about the importance in detecting interaction failures within software systems. The article also demonstrates the effectiveness of t-way combinations fault detection across various domains. The article “Pairwise Testing” talks about pair testing as a permutation and combination technique aimed at testing each pair of input parameters to ensure that the system if functioning properly across all possible combinations. The article also addresses the many benefits of pairwise testing and it’s role in reducing test execution time and cost while maintaining test coverage. Also, it talks about the challenges associated with pairwise testing, including the limitations in detecting interactions beyond pairwise combinations.
Pairwise Testing
pairwise testing is a software testing method that aims to comprehensively validate the behavior of a system by testing all possible pairs of input parameters. This method is mainly used when many of the defects in software systems are triggered by interactions between pairs of input parameters, rather than by individual parameters in isolation.
Benefits & Challenges
some benefits that pairwise offers is, efficiency: by testing the combinations of two input parameters at a time. This reduce’s the number of test cases required compared to exhaustive testing. pairwise testing also offers effective defect detection: by effectively finding defects that are triggered by interactions between pairs of input parameters, pairwise testing also helps to identify certain scenarios by systematically exploring pairs of parameters. Some challenges that pairwise testing may face is when it comes to parameter selection. Selecting the right parameters is crucial and requires a lot of knowledge of the software and it’s potential interaction scenarios. If the wrong parameter is selected this can lead to incomplete test coverage and missed defects.
Combinatorial Testing
Combinatorial testing is a software testing technique that focuses on efficiently testing the interactions between different input parameters of a system. This test method involves generating a set of test cases that include various combinations of input values / specific parameter values.
Benefits & Challenges
Some benefits of combinational testing include improved software quality: by being able to identify and address the interaction failures early in the development process. This test method tests various combinations of input parameters, which can help find defects that could impact the systems performance. A challenge that combinational testing may face is the scalability. Combinatorial testing is effective for small to medium sized systems and when scaling it to large and complex systems with a high number of input parameters and values, you may run into some problems.
Why did I pick this Article?
I pick these two article that talk about pairwise and combinatorial testing because both these test methods stand at the forefront of software test methods. The article’s goes into details about how both of these test methods offer an efficient way to ensure comprehensive test coverage while minimizing redundancy. Both of these articles have taught me a lot about pairwise and combinational testing.
Reflection
After reading both of these articles, I have gained a greater understanding of both these test cases. With the new found knowledge, I aspire to apply pairwise and combinatorial testing techniques in my future projects. Both these test methods offer practical solutions to common testing challenges, and by incorporating them into my future endeavors I aim to contribute to the development of reliable software systems.
This past semester I have been spending a lot of time in my QA class working with JUnit 5. I want to be able to take my familiarity with JUnit and apply the same principles with unit testing in Python. I am leaning toward a data-centric career path and Python is widely used for data analytics, so this would be valuable information for me.
This post is not an expert-authored tutorial on Python unit testing because I, myself, am just getting started with it. In this post I will instead give tiny, bite-sized examples of just the basics, translating it from JUnit to Python unittest. I built identical, small classes in Java and Python, and will build tests to go with them. Below are the classes in Java and Python, respectively.
/**
 * Simple class with basic methods, written in Java
 * @author Christian Shadis
 */
public class main {
    public static void main(String[] args){
        int i = 0; // dummy code to keep compiler happy
    }

    public static int addTwoNumbers(int x, int y){
        return x + y;
    }

    public static String toCapital(String str){
        return str.toUpperCase();
    }
}
# Simple class with basic functions, written in Python
# Author: Christian Shadis

class main:
    def add_two_numbers(x, y):
        return x+y

    def to_capital(string):
        return string.upper()
Writing the unit tests in JUnit is simple: we import the JUnit assertions, and the @Test annotation. Then we create the test class, each of the two tests, setup, exercise, and verify just as always.
/**
 * Test Class for main.java
 * @author: Christian Shadis
 */
import static org.junit.jupiter.api.Assertions.*;
import org.junit.jupiter.api.Test;

public class maintest {

    @Test
    void testAddTwoNumbers(){
        int result; // setup
        result = main.addTwoNumbers(566, 42); // exercise
        assertEquals(result, 608); // verify
    }

    @Test
    void testToCapital(){
        String result; // setup
        result = main.toCapital("string"); // exercise
        assertEquals(result, "STRING"); // verify
    }
}
Luckily, writing unit tests is just as easy in Python as Java. We import the unittest library and the other class, define the class, and add a Test Case object as the parameter.
import unittest
from main import *

class maintest(unittest.TestCase):
import unittest
from main import *

class maintest(unittest.TestCase):

    def test_add_two_numbers(self):

        pass
    def test_to_capital(self):

        pass
Now we need a test case for each of our two functions, add_two_numbers and to_capital. Python’s unittest objects have very similar assertions as in JUnit. Use assertEqual(x, y) to check that x == y. This is the assertion we will use in this example, but any of the following are commonly used unittest assertions:
assertEqual
assertNotEqual
assertTrue
assertFalse
assertIs
assertIsNot
assertIsNone
assertIsNotNone
assertIn
assertNotIn
assertIsInstance
assertIsNotInstance
assertEqual takes two arguments and, as the name suggests, asserts their equality. See the implementation below:
    def test_add_two_numbers(self):
        result = main.add_two_numbers(33, 44)
        self.assertEqual(result, 77)

    def test_to_capital(self):
        result = main.to_capital("hi")
        self.assertEqual(result, "HI")
Run the tests and you will see them both pass. Below is a screenshot of the tests executing in Python and then in JUnit. As you can see, the Python tests are slightly faster than the Java tests, but not by much. I used IntelliJ IDEA and Pycharm IDE.
I have found the most helpful way to learn testing is to just play around with the unit tests, see what works and what doesn’t, see what causes failures and what those failures look like, and so forth. I would suggest any other beginner QA student to do the same. Playing around with different assertions and looking at the unittest documentation is a great way to learn this library. I hope this post gave you some insight on how to get started with unit testing your Python modules if you have done some work with JUnit in the past.
Christian Shadis, CS-443 Self-Directed Blog Post #4
For students like me with limited experience writing JUnit tests, it becomes easy to get lost in the repetition of “Setup, Exercise, Verify” and not realize that a simple, understandable feature of JUnit testing, annotations, can be used to improve the functionality and efficiency of your JUnit Test Suites. In this post I will explain the uses five JUnit 5 annotations and demonstrate them. The following annotations will be explained:
We begin with an extremely simple Java class “Book” and its similarly simple counterpart “BookTest”. See the code for the two classes below.
public class Book {

    private int pages;
    private String author;
    private int pubYear;

    public Book(int pages, String author, int pubYear){
        this.pages = pages;
        this.author = author;
        this.pubYear = pubYear;
    }

    public int getPages(){ return this.pages; }
    public String getAuthor(){ return this.author; }
    public int getPubYear(){ return this.pubYear; }

    public void setPages(int pages){ this.pages = pages; }
    public void setAuthor(String author){ this.author = author; }
    public void setPubYear(int pubYear){ this.pubYear = pubYear; }
}
import static org.junit.jupiter.api.Assertions.*;
import org.junit.jupiter.api.BeforeEach;
import org.junit.jupiter.api.Test;

public class BookTest {

    @Test
    void testConstructor(){
        Book book1 = new Book(100, "John Doe", 1999);
        boolean result = book1 instanceof Book;
        assertTrue(result);
    }

    @Test
    void testGetPages(){
        Book book1 = new Book(100, "John Doe", 1999);
        int result = book1.getPages();
        assertEquals(result, 100);
    }

    @Test
    void testGetAuthor(){
        Book book1 = new Book(100, "John Doe", 1999);
        String result = book1.getAuthor();
        assertEquals(result, "John Doe");
    }

    @Test
    void testGetPubYear(){
        Book book1 = new Book(100, "John Doe", 1999);
        int result = book1.getPubYear();
        assertEquals(result, 1999);
    }

    @Test
    void testSetPages(){
        Book book1 = new Book(100, "John Doe", 1999);
        book1.setPages(150);
        assertEquals(book1.getPages(), 150);
    }

    @Test
    void testSetAuthor(){
        Book book1 = new Book(100, "John Doe", 1999);
        book1.setAuthor("Jane Smith");
        assertEquals(book1.getAuthor(), "Jane Smith");
    }

    @Test
    void testSetPubYear(){
        Book book1 = new Book(100, "John Doe", 1999);
        book1.setPubYear(2001);
        assertEquals(book1.getPubYear(), 2001);
    }
}
@BeforeEach
The first annotation we will look at is @BeforeEach. This annotation is used for repetitive code that is executed during each test case. If you examined BookTest closely, you might have noticed that the first line of every test case is identical. This makes our suite the perfect candidate to use @BeforeEach. In order to implement, we must create a setUp test method, and put book1 as an instance variable – this way, scope does not become a nuisance. See the revised BookTest.java file below.
import static org.junit.jupiter.api.Assertions.*;
import org.junit.jupiter.api.BeforeEach;
import org.junit.jupiter.api.Test;

public class BookTest {

    Book book1;

    @BeforeEach
    void setUp(){
        book1 = new Book(100, "John Doe", 1999);
    }

    @Test
    void testConstructor(){
        boolean result = book1 instanceof Book;
        assertTrue(result);
    }

    @Test
    void testGetPages(){
        int result = book1.getPages();
        assertEquals(result, 100);
    }

    @Test
    void testGetAuthor(){
        String result = book1.getAuthor();
        assertEquals(result, "John Doe");
    }

    @Test
    void testGetPubYear(){
        int result = book1.getPubYear();
        assertEquals(result, 1999);
    }

    @Test
    void testSetPages(){
        book1.setPages(150);
        assertEquals(book1.getPages(), 150);
    }

    @Test
    void testSetAuthor(){
        book1.setAuthor("Jane Smith");
        assertEquals(book1.getAuthor(), "Jane Smith");
    }

    @Test
    void testSetPubYear(){
        book1.setPubYear(2001);
        assertEquals(book1.getPubYear(), 2001);
    }
}
@AfterEach
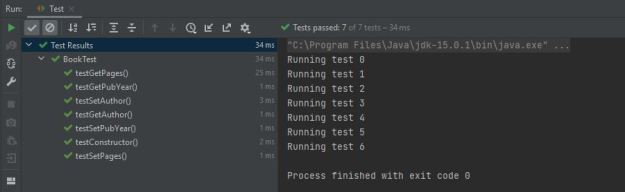
Analogous to @BeforeEach, @AfterEach will execute following each test case. There is no obvious implementation in our code, but I will demonstrate its use nonetheless. We can use @AfterEach to update a count variable indicating how many tests are run. We add a print statement to our setup method to print the test number, and add count as an instance variable, initialized to 0. @AfterEach will allow us to increment the count after each test case is run. Create a method tearDown() with the @AfterEach annotation, and add “count++;” as the body. The count declaration must also be revised to a public static modifier. The new instance variables, setUp(), and tearDown() methods are shown below.
public class BookTest {

    Book book1;
    private static int count = 0;


    @BeforeEach
    void setUp(){
        book1 = new Book(100, "John Doe", 1999);
        System.out.println("Running test " + count);
    }

    @AfterEach
    void tearDown(){
        count++;
    }
.
.
.
}
We now have methods that execute before and after every single test case.
@BeforeAll
@BeforeAll is used as an initialization method that executes before any other method. It is the first method in BookTest that will be run. We can use it in this example to instantiate our count variable to 0, and leave just the variable declaration with the instance variables. See the modified instance variables and new init() method below.
public class BookTest {

    private static int count;
    Book book1;

    @BeforeAll //runs first
    public static void init(){
        System.out.println("BeforeAll running: count set to 0.");
        count = 0;
    }
.
.
.
}
@ParameterizedTest
This annotation is useful for running test cases with multiple inputs. For example, imagine the developer of BookTest is unsure whether testSetAuthor() will pass when multi-word strings are passed as arguments. This scenario is the perfect situation to use a parameterized test. When using @ParameterizedTest, however, one must be sure to specify the source of the arguments, which is accomplished using the annotation @ValueSource. See the example below.
This annotation is used for when tests need to be run multiple times. For example, if we wanted to run testGetAuthor three times, we would use this annotation. When using @RepeatingTest, we must pass a parameter value which determines the number of repetitions, and name which names each repetition. See the example below.
@RepeatedTest(value = 3, name = "Repetition {currentRepetition}")
void testGetAuthor(){
String result = book1.getAuthor();
assertEquals(result, "John Doe");
}
Summary
We have now taken an extremely simple JUnit 5 test suite and used five different annotations to make the suite a bit more complex and comprehensive. There are many more annotations, all of which can be found in the JUnit documentation here. We can now run tests multiple times, create setup and teardown methods, and parameterize tests to run them with multiple argument inputs.
public class Book {
private int pages;
private String author;
private int pubYear;
public Book(int pages, String author, int pubYear){
this.pages = pages;
this.author = author;
this.pubYear = pubYear;
}
public int getPages(){ return this.pages; }
public String getAuthor(){ return this.author; }
public int getPubYear(){ return this.pubYear; }
public void setPages(int pages){ this.pages = pages; }
public void setAuthor(String author){ this.author = author; }
public void setPubYear(int pubYear){ this.pubYear = pubYear; }
}
import static org.junit.jupiter.api.Assertions.*;
import org.junit.jupiter.api.*;
import org.junit.jupiter.params.ParameterizedTest;
import org.junit.jupiter.params.provider.ValueSource;
public class BookTest {
private static int count;
Book book1;
@BeforeAll
public static void init(){
System.out.println("BeforeAll running: count set to 0.");
count = 0;
}
@BeforeEach
void setUp(){
book1 = new Book(100, "John Doe", 1999);
System.out.println("Running test " + count);
}
@AfterEach
void tearDown(){
count = count + 1;
}
@Test
void testConstructor(){
boolean result = book1 instanceof Book;
assertTrue(result);
}
@Test
void testGetPages(){
int result = book1.getPages();
assertEquals(result, 100);
}
@RepeatedTest(value = 3, name = "Repetition {currentRepetition}")
void testGetAuthor(){
String result = book1.getAuthor();
assertEquals(result, "John Doe");
}
@Test
void testGetPubYear(){
int result = book1.getPubYear();
assertEquals(result, 1999);
}
@Test
void testSetPages(){
book1.setPages(150);
assertEquals(book1.getPages(), 150);
}
@ParameterizedTest
@ValueSource(strings = {"Jane", "Jane Smith"})
void testSetAuthor(String str){
    book1.setAuthor(str);
    assertEquals(book1.getAuthor(), str);
}
@Test
void testSetPubYear(){
book1.setPubYear(2001);
assertEquals(book1.getPubYear(), 2001);
}
}
A few weeks ago, I was introduced to JUnit testing in my Software Quality Assurance & Testing course. The blog post tutorial linked below is one I would recommend to those interested in learning about assertion. Reading this post has helped me review the concepts I have learned and I will share what helped me better understand the topic of writing basic assertions with AssertJ.
I found this content useful as it started off by covering whether a user had Maven or Gradle for declaring the dependency and then we get to dive into scenarios when a certain feature would be used. Some examples of what you can test with assertions includes: boolean values (true/false), whether or not something is NULL, comparing the result with a number or string (EqualTo()), object references, and arrays that are equal.
There is a walk-through of what we want to test with a basic scenario of when we would want to use it and this information makes me appreciate how much this kind of testing helps simplify things. It adds more structure to what we would like to do and by being able to import it, saves us so much more time in the end.
Honestly, in class I tend to spend more of my time trying to follow steps instead of absorbing what the material is and this article really helped me realize things like “oh, so this is why we use this line of code” or “so that’s why this is always there.” As a visual person, I appreciate the articles which actual include code examples for us to see what’s being used or added to explain a concept which was very helpful in this case. I do not disagree with any of the content provided as it is much more technical and there is reasoning behind each part of the process.
Overall, I would keep this article bookmarked and may come back to use it as a reference whether it be for a future testing assignment or just for trying to refresh this in my memory. As a side note, installing gradle on our laptops in class enabled us to run our tests through the terminal which was a pretty cool experience.


 A few weeks ago, I was introduced to JUnit testing in my Software Quality Assurance & Testing course. The blog post tutorial linked below is one I would recommend to those interested in learning about assertion. Reading this post has helped me review the concepts I have learned and I will share what helped me better understand the topic of writing basic assertions with AssertJ.