Mr. Bugayenko talks about the structure of a simple Java project and return values of various methods. In the article, it shows how much work it would take to mock a program that has multiple levels of abstraction and if we did mock everything, it would obscure the meaning of our tests because our tests will would have multiple levels of abstraction and makes it that much harder to see what exactly we are testing. In the end, it would also make the test file much longer than our main file. In situations like this, it would be easier to use fakes.
“Sweep the Floor” is perhaps an Apprenticeship Pattern that I’ve seen most closely paralleled in the real world. The pattern proposes that the price of admission onto a team may be that the newly crested member start by doing the unglamorous jobs —hence the title of the pattern—, often this will be things such as differed maintenance or writing reports. This is manyfold: it proves capability, builds trust that you can work independently, allows for controlled and low-stakes contribution to the project, and will free up the more vested members’ time to teach you higher stakes tasks.
As I alluded to, this ritualistic humbling seems to be inevitable in any profession, particularly in what gets oft classified as skilled-work. When I was a mail processing mechanic, the first thing we new recruits were delegated was daily maintenance tasks such as changing rubber belts on a feeder assembly, or changing drive belts that were in the lower tiers of the mail processing machines; the latter considered the most uncomfortable —sometimes downright painful— task to work on. While I don’t suspect that updating documentation or eliminating technical debt will be nearly as dirty as being covered in paper shreddings and ink dust I felt this quote in particular was a very powerful way to bind the metaphor of back to software development:
“These sorts of fringe tasks benefit the team, but they will also benefit you as an apprentice, because such chores are often skipped in academic courses and by doing them you can fill in the gaps in your knowledge. This experience will serve you well as a journeyman too, because any master who takes you on will understand how valuable it is to have someone to do the unglamorous work. After all, if no one sweeps the floor, then the glamorous work can’t be done because the team is hip-deep in dirt.”
The authors made sure to mention my primary criticism of this learning style which is what they have called becoming the team’s gopher. If it were not apparent, a quick definition of a gopher is one who has become known to absorb the menial or painful work and thus gets typecast into that roll permanently, condemned to the strictly utility work which creates a lag on your understanding of current developments in the code base and hurt your chances of upward mobility. The authors’ prescription is relentlessly advocate for yourself, Nurture Your Passion, and Unleash Your Enthusiasm.
According to the article linked above, integration testing is a type of software testing that focuses on how well different components of a system interact with each other. For example, when assembling a pen, one would ideally test if all the parts for a pen fit together like the cap, ink cartridge, tail, among other parts. There are two main types of integration testing called unit integrated testing and system integrated testing respectively. Unit integrated testing focuses on testing the interactions and interfaces between integrated components. System integrated testing focuses on testing the interactions and interfaces between systems. There are also four ways to approach integration testing called Big Bang, Top Down, Bottom Up, and Sandwich or Hybrid. Big Bang is when most if not all components are tested at once such as all the functionalities in a system. Top Down is when top-level components are tested first followed by lower-level components. Bottom Up is the opposite where low-level components are tested first followed by higher-level ones. Sandwich, also called Hybrid, is combination of both Top Down and Bottom Up approaches.
For my software capstone, me and three other team members are working on an inventory system. Each of us are working on different components; for example, I am working on the backend API and a messaging system. Right now, I’m in the middle of testing the API by itself, but I’ll have to test it in conjunction with other components like the messaging system, the rest of the backend, the frontend, and also the other systems that are being developed simultaneously. One could call this a form of integration testing, focusing both on the unit and system levels. I feel I’ll take a Hybrid approach since what’ll be tested first is whatever I finish first and what my teammates finish first.
The “Draw Your Own Map Pattern” is chiefly about assessing your current role in an organization and looking forward to your next professional endeavor, be it within that organization, or externally. The Problem section explicitly defines the situation such that your current employer does not have the position you’re looking for in your organization. The proposed solution, in summary, is to put careful thought into your future external position and then create a plan with micro steps to get you there; these steps will help keep your sights on the potential position.
The pattern seems to coincide very much with the steps I’ve taken in life. I’ve personally undergone a very windy path to get where I am now and will certainly be considered having an unconventional path in any career I manage to land outside of college. While I don’t always have scheduled periods of reflection in my career, I find that periodically discussing with coworkers what they want to make of their careers inspires them to pursue their goals and also forces me to look inward and re-evaluate if I’m happy with my career at that point.
Perhaps my favorite takeaway from this pattern was the activity provided in the Action section at the bottom. For the unacquainted, the activity requests the reader to make a map of three jobs that could be logically pursued beyond their current one. The authors then insist that the reader do this with the web of three jobs for each of the previous branches and assess if any of these roles would satisfy them. The exercise implores that the branching is done one more time and this final iteration should be roughly representative of your total career prospects. I found that engaging with this exercise left me feeling hopeful and optimistic about my potential career paths —which is to be expected as a student— and would specifically recommend it to others looking to make a change who may be a bit more pessimistic about their prospects. As someone who has hopped careers, the hesitancy to reconsider one’s career comes from a fear of needing to take drastic action but by using this exercise I think those in a similar situation to my own would realize that they’re not as far from their destination as they may seem.
Christian Shadis, CS-443 Self-Directed Blog Post #4
For students like me with limited experience writing JUnit tests, it becomes easy to get lost in the repetition of “Setup, Exercise, Verify” and not realize that a simple, understandable feature of JUnit testing, annotations, can be used to improve the functionality and efficiency of your JUnit Test Suites. In this post I will explain the uses five JUnit 5 annotations and demonstrate them. The following annotations will be explained:
We begin with an extremely simple Java class “Book” and its similarly simple counterpart “BookTest”. See the code for the two classes below.
public class Book {

    private int pages;
    private String author;
    private int pubYear;

    public Book(int pages, String author, int pubYear){
        this.pages = pages;
        this.author = author;
        this.pubYear = pubYear;
    }

    public int getPages(){ return this.pages; }
    public String getAuthor(){ return this.author; }
    public int getPubYear(){ return this.pubYear; }

    public void setPages(int pages){ this.pages = pages; }
    public void setAuthor(String author){ this.author = author; }
    public void setPubYear(int pubYear){ this.pubYear = pubYear; }
}
import static org.junit.jupiter.api.Assertions.*;
import org.junit.jupiter.api.BeforeEach;
import org.junit.jupiter.api.Test;

public class BookTest {

    @Test
    void testConstructor(){
        Book book1 = new Book(100, "John Doe", 1999);
        boolean result = book1 instanceof Book;
        assertTrue(result);
    }

    @Test
    void testGetPages(){
        Book book1 = new Book(100, "John Doe", 1999);
        int result = book1.getPages();
        assertEquals(result, 100);
    }

    @Test
    void testGetAuthor(){
        Book book1 = new Book(100, "John Doe", 1999);
        String result = book1.getAuthor();
        assertEquals(result, "John Doe");
    }

    @Test
    void testGetPubYear(){
        Book book1 = new Book(100, "John Doe", 1999);
        int result = book1.getPubYear();
        assertEquals(result, 1999);
    }

    @Test
    void testSetPages(){
        Book book1 = new Book(100, "John Doe", 1999);
        book1.setPages(150);
        assertEquals(book1.getPages(), 150);
    }

    @Test
    void testSetAuthor(){
        Book book1 = new Book(100, "John Doe", 1999);
        book1.setAuthor("Jane Smith");
        assertEquals(book1.getAuthor(), "Jane Smith");
    }

    @Test
    void testSetPubYear(){
        Book book1 = new Book(100, "John Doe", 1999);
        book1.setPubYear(2001);
        assertEquals(book1.getPubYear(), 2001);
    }
}
@BeforeEach
The first annotation we will look at is @BeforeEach. This annotation is used for repetitive code that is executed during each test case. If you examined BookTest closely, you might have noticed that the first line of every test case is identical. This makes our suite the perfect candidate to use @BeforeEach. In order to implement, we must create a setUp test method, and put book1 as an instance variable – this way, scope does not become a nuisance. See the revised BookTest.java file below.
import static org.junit.jupiter.api.Assertions.*;
import org.junit.jupiter.api.BeforeEach;
import org.junit.jupiter.api.Test;

public class BookTest {

    Book book1;

    @BeforeEach
    void setUp(){
        book1 = new Book(100, "John Doe", 1999);
    }

    @Test
    void testConstructor(){
        boolean result = book1 instanceof Book;
        assertTrue(result);
    }

    @Test
    void testGetPages(){
        int result = book1.getPages();
        assertEquals(result, 100);
    }

    @Test
    void testGetAuthor(){
        String result = book1.getAuthor();
        assertEquals(result, "John Doe");
    }

    @Test
    void testGetPubYear(){
        int result = book1.getPubYear();
        assertEquals(result, 1999);
    }

    @Test
    void testSetPages(){
        book1.setPages(150);
        assertEquals(book1.getPages(), 150);
    }

    @Test
    void testSetAuthor(){
        book1.setAuthor("Jane Smith");
        assertEquals(book1.getAuthor(), "Jane Smith");
    }

    @Test
    void testSetPubYear(){
        book1.setPubYear(2001);
        assertEquals(book1.getPubYear(), 2001);
    }
}
@AfterEach
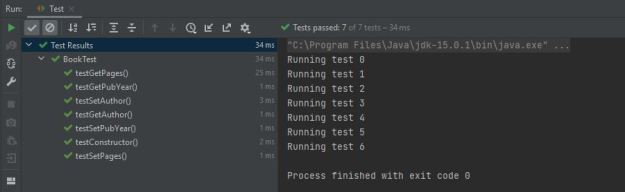
Analogous to @BeforeEach, @AfterEach will execute following each test case. There is no obvious implementation in our code, but I will demonstrate its use nonetheless. We can use @AfterEach to update a count variable indicating how many tests are run. We add a print statement to our setup method to print the test number, and add count as an instance variable, initialized to 0. @AfterEach will allow us to increment the count after each test case is run. Create a method tearDown() with the @AfterEach annotation, and add “count++;” as the body. The count declaration must also be revised to a public static modifier. The new instance variables, setUp(), and tearDown() methods are shown below.
public class BookTest {

    Book book1;
    private static int count = 0;


    @BeforeEach
    void setUp(){
        book1 = new Book(100, "John Doe", 1999);
        System.out.println("Running test " + count);
    }

    @AfterEach
    void tearDown(){
        count++;
    }
.
.
.
}
We now have methods that execute before and after every single test case.
@BeforeAll
@BeforeAll is used as an initialization method that executes before any other method. It is the first method in BookTest that will be run. We can use it in this example to instantiate our count variable to 0, and leave just the variable declaration with the instance variables. See the modified instance variables and new init() method below.
public class BookTest {

    private static int count;
    Book book1;

    @BeforeAll //runs first
    public static void init(){
        System.out.println("BeforeAll running: count set to 0.");
        count = 0;
    }
.
.
.
}
@ParameterizedTest
This annotation is useful for running test cases with multiple inputs. For example, imagine the developer of BookTest is unsure whether testSetAuthor() will pass when multi-word strings are passed as arguments. This scenario is the perfect situation to use a parameterized test. When using @ParameterizedTest, however, one must be sure to specify the source of the arguments, which is accomplished using the annotation @ValueSource. See the example below.
This annotation is used for when tests need to be run multiple times. For example, if we wanted to run testGetAuthor three times, we would use this annotation. When using @RepeatingTest, we must pass a parameter value which determines the number of repetitions, and name which names each repetition. See the example below.
@RepeatedTest(value = 3, name = "Repetition {currentRepetition}")
void testGetAuthor(){
String result = book1.getAuthor();
assertEquals(result, "John Doe");
}
Summary
We have now taken an extremely simple JUnit 5 test suite and used five different annotations to make the suite a bit more complex and comprehensive. There are many more annotations, all of which can be found in the JUnit documentation here. We can now run tests multiple times, create setup and teardown methods, and parameterize tests to run them with multiple argument inputs.
public class Book {
private int pages;
private String author;
private int pubYear;
public Book(int pages, String author, int pubYear){
this.pages = pages;
this.author = author;
this.pubYear = pubYear;
}
public int getPages(){ return this.pages; }
public String getAuthor(){ return this.author; }
public int getPubYear(){ return this.pubYear; }
public void setPages(int pages){ this.pages = pages; }
public void setAuthor(String author){ this.author = author; }
public void setPubYear(int pubYear){ this.pubYear = pubYear; }
}
import static org.junit.jupiter.api.Assertions.*;
import org.junit.jupiter.api.*;
import org.junit.jupiter.params.ParameterizedTest;
import org.junit.jupiter.params.provider.ValueSource;
public class BookTest {
private static int count;
Book book1;
@BeforeAll
public static void init(){
System.out.println("BeforeAll running: count set to 0.");
count = 0;
}
@BeforeEach
void setUp(){
book1 = new Book(100, "John Doe", 1999);
System.out.println("Running test " + count);
}
@AfterEach
void tearDown(){
count = count + 1;
}
@Test
void testConstructor(){
boolean result = book1 instanceof Book;
assertTrue(result);
}
@Test
void testGetPages(){
int result = book1.getPages();
assertEquals(result, 100);
}
@RepeatedTest(value = 3, name = "Repetition {currentRepetition}")
void testGetAuthor(){
String result = book1.getAuthor();
assertEquals(result, "John Doe");
}
@Test
void testGetPubYear(){
int result = book1.getPubYear();
assertEquals(result, 1999);
}
@Test
void testSetPages(){
book1.setPages(150);
assertEquals(book1.getPages(), 150);
}
@ParameterizedTest
@ValueSource(strings = {"Jane", "Jane Smith"})
void testSetAuthor(String str){
    book1.setAuthor(str);
    assertEquals(book1.getAuthor(), str);
}
@Test
void testSetPubYear(){
book1.setPubYear(2001);
assertEquals(book1.getPubYear(), 2001);
}
}
Although I may not have stated it explicitly, I wrote my previous post regarding using boundary values during testing on programs that are, more or less, complete with all the necessary functions having been implemented. That can be the case for a programmer who is working on software that is relatively small and can be coded to completion by a single individual. Though, one would ask, what happens when the project’s scale is large enough that multiple people would need to be assigned to code certain chunks of code that would be combined into a complete piece of software? The programmers may have some guidelines on or a semblance of how the software should work as a whole, including some of the parts they aren’t actually assigned to implement, yet they may not have the time or resources to work on the other functionalities on top of the ones assigned to them. Yet, to ensure that their assigned functionalities work according to specifications, they will still need the missing code to be implemented for which they may not know how to implement, mostly because of certain specifications that are expected to be met yet are unknown to the programmer. And the cycle continues.
In such cases, one technique that programmers can utilize in order to test their Work-In-Progress code without having to manually implement the missing code is test doubles. Essentially, programmers use test doubles as a way to make up for the missing functionalities by implementing simplified objects or methods such that the can still be run with minimal amount of code that can be easily replaced by the actual final product. Test doubles include, but are not limited to, the following: 1) Dummies 2) Stubs 3) Fakes 4) Mocks
I will be discussing Mocks along with Mockito in more detail in a later post. Instead, in this post I will be focusing on the first three types of test doubles that are given above. What I will mention about mocks, however, is that they can utilize the Mockito testing framework to automate and simplify the process of testing to a more significant degree compared to the previous three types. It goes without saying, however, that each approach has its own merits depending on the needs.
Dummies or dummy objects are objects or procedures with minimal, if any, implementation, making it by far the simplest form of test double implementation. In other words, dummy objects can be considered a bare-bone implementation of code that is sufficient enough to help in testing. Below is a simple example of a dummy object:
public DummyObject(){ } Essentially, the above dummy object is more than enough code even though lacks the implementation. Dummy objects are created to be used when other methods may require parameters, though in this particular case we are not actually creating the objects ourselves.
Stubs are (or I at least believe they are) a more common method of testing methods. Essentially, stubs contain slightly more (yet still bare-bones) implementation than dummies, which is more often than not a predefined return value that corresponds to the return type. Below is an example of a stub method: public double average(double a, double b){ return 3.1; } In the above example, the method will not do any calculations. Instead, it will return an arbitrary value that is relevant to the return type, without any other significance whatsoever. Stubs are used to test if the method actually responds when being called during testing, rather than if the method produces an expected result after running a specific set of computations. I have found myself using stubs when programming in C earlier in my studies just to make sure if other parts of my code can be compiled properly, though now I know that stubs may also be used in unit testing as well.
The last type of test doubles I will be talking about is fakes. Fakes or fake objects have some implementation, though this implementation is often different from that in the end product. Fake objects do not actually use resources (such as data from a database) but may use some arbitrary data in order for the object to be used in testing. An example of a fake object is given below:
Compared to stubs and dummies, fakes contain more implementation, though they are much “lighter” to use than actual objects that contain data that may need to be retrieved in one way or another.
Overall, which of the above implementations may need to be used in testing depends solely on the programmer’s judgement and the state of their code. When combined with other testing techniques (such as boundary value testing), unit testing may provide enough insight to the developers in order to make the appropriate adjustments to their software, be it in regards to fixing faulty code or implementing better optimization. Like I mentioned earlier, each technique has its own merits depending on the circumstances. Moreover, in my next post I will be discussing Mock objects, the Mockito testing framework, and some of the advantages Mockito brings to software testing.
When working on a piece of software or project, often I will encounter a point where some particular piece of the program cannot be tested properly due to one or more components or features not being completed yet. Rather than waiting until all these things are completed, and potentially rushing them to completion in order to do testing, mocking allows me to bypass the issue and use a “mock” version of the missing dependency or component needed for testing.
This is a convenient way to get around having to develop the entire program all at once before being able to test anything, which could arguably lead to more errors or issues over time since you then aren’t able to test as you implement features, but rather only after they have all been implemented. This aspect alone makes mocking seem like an overtly beneficial concept. But there are some drawbacks to consider with mocking, some of which I will discuss below.
In regards to the first issue, repetition, I think that in some cases that this can be justified, and while mocking does represent some duplication in that it is taking a preexisting piece of the program and creating a placeholder for it, this seems unlikely to have the same negative effects that say, having three different train classes which only differ in the value of their color attribute.
The second and third points regarding refactoring and complication of the program seem like legitimate pitfalls to watch out for. When restructuring, the various mocks present could no longer be applicable based on changes in the location of various dependencies and test-cases in relation to them. Mocking does introduce an additional layer of complexity which would not otherwise be present, definitely a fair concern to consider.
Overall, I would say that most of the issues associated with mocking which are described by the author can be mitigated or completely avoided provided that they are considered during development. Mocking still seems in general to be a benefit in relation to testing during development rather than after it has been feature-completed.
Having covered recording knowledge in the previous week, and specifically considering the conclusion I arrived at, it was only logical to cover the Breakable Toys pattern next. For those who missed that post, I determined that the best method to keep track of previous knowledge was to use a breakable toy that others could access. This would allow one to both record any information, create a potential feedback loop if others can access this information, and finally just get experience by building and maintaining this toy. But this all begs the question, what exactly is a breakable tool?
These toys can come in a variety of forms that can be decided based on your own interests, but each should be a software project that you will complete on your own. This can range from a wiki or a blog to a calendar or even a video game, but there are some important points to keep in mind about the purpose of these toys. Of course these toys will be helpful in your growth as a software developer, but in order to reach a sufficient level of development on these projects you must maintain your motivation. When choosing a breakable tool to create, ensure that it is something that you know you will enjoy developing further down the line. This may sound obvious, but there are many times where I myself have dropped projects after the initial excitement dies down. Furthermore these toys do not have to be complex, especially at the outset of their development. While it might be tempting to have a vast amount of features to implement in this new project, and it may come from a place of genuine wanting to learn how these work, you should keep in mind that this toy can be developed over a long period of time. Focus first on developing the toy in its most basic form and slowly build on it as your development skill progress, allowing for even further growth.
In summary, these breakable tools should be personal projects in any form that interests you and should be something you return to for further development. This pattern has changed my view from what I said in my previous post, as I was initially going to make a wiki or blog. If I am being honest with myself, making a game appeals to me more than many of the other options for tools that I had listed. I have been playing them for a long time and have always had interest in developing one, especially working on an AI system within the game. Once again I had nothing to disagree with, this was a great read!
For the Sprint, I worked mostly on the Event System components with the Backend person. We figured out how to properly send and receive messages using the JSON object.
What worked well / did not work well
For the Sprint, I worked mostly on the Event System components with the Backend person. We figured out how to properly send and receive messages using the JSON object. I noticed that working together with the team has improved our work productivity significantly and working together helped us to solve problems as a team. For this Sprint there were still a lot of confusing elements. Especially, we had a hard time understanding how the report worked and what the data was involved in the report. Also, the issue description on Gitlab was not precise enough or was not broken down into steps. We were lost in some aspects and did not know what questions to ask. However, it is almost the end of the semester and everyone is busy with exams and project from other classes
What changes could be made to improve as a team?
As a team, we should be communicating more with each other and the professor whenever there is confusion or questions regarding the materials. Also, breaking down the task into small issues will help the team tackle problems one by one. I think it will be great for our team to talk with the other group for example all the FrontEnd people can meet and talk more about the issues and problems they are facing. The same goes for the backend, this will help improve as a team. We also need to add more info to the cards which solve the issue of any confusion regarding who is doing what task.
What changes could be made to improve as an Individual?
As an Individual, I should be talking with my team more rather than just doing the issues that are assigned to me. If I am struggling with something, then I should ask my teammate or the professor for help rather than just waiting and trying to figure out myself. Since it towards the end of the semester and since every class, I have a project, I should be planning or a schedule to work on individual tasks rather than doing everything at once.
Overall, this was a great learning experience. I think the second sprint was a success and we got a lot of working parts done for the project. I’m looking forward to seeing what the reporting team will accomplish towards the end of the semester.
As stated in my previous post, I did a group honors project where each member covered a different software testing tool. The primary reason for this was to determine which tools were useful for what purpose, one of which, being Jacoco, I covered in the previous post as well. But, after having heard each group member’s analysis of their tools it begged the question, which tool is best? To properly discuss this I will be examining the pros and cons to each of the tools my group member’s covered in addition to a brief summary of Jacoco.
First there is PIT, which is a mutation testing tool. I was not familiar with these different types of tests, so I will give a quick explanation of what they are. Mutation testing involves the tool essentially making multiple copies of the code which are then given faults, these being the titular mutations. Tests are then run against each mutant with the result being the mutant’s death, meaning the tests failed, or the mutant surviving, meaning the tests passed. The quality of these tests is then determined by the amount of mutants that could be killed. This method of testing is very robust and covers code coverage as well, but this results in these tests being slower than others. PIT is advantageous as it is the fastest of the mutation tests, and has a lot of support from build tools. The other type of testing covered was Programming Mistake Detector, or PMD for short. This tool focuses on finding more expected flaws, like unused variables, useless objects, empty catch blocks, and other such errors we are all familiar with. In addition to this it can also spot any duplicated code with a copy-paste-detector. This is all handled by rules used to test source code, which are grouped into rule sets. Unlike mutation tests, this is much more lightweight and easy to run from a command line, additionally you can run multiple rulesets at once. However this is a less robust testing method, not accounting for any runtime issues or a way to match a ruleset with its generated error easily when running rulesets on a file. So what is the verdict?
Ultimately, there is only really one type of testing that seems sufficient to be used in and of itself, this being mutation testing with PIT. If you are looking for the most condensed testing tool that can do the most in one package, this would be the answer. However you will want to ensure that using mutation testing is necessary, as if you are only really concerned about code coverage Jacoco would be easier and more efficient. Simultaneously, if you want to check the code itself to ensure there are not many errors and do not care about the coverage, you can implement PMD. The answer will ultimately vary from system to system, and if you want to read more about these tools I have provided some resources below. If you want to read about Jacoco be sure to check my previous post!